Showing posts with label Stampin' Up. Show all posts

Saturday, 19 January 2013

A Bunch Of Odds & Sods

Good Evening Girlz...

I was doing some playing one night this past week.  Quite a while ago I bought a set of stamps at a garage sale.  I know they are from around 2005 but don't have the name from Stampin Up.  I tried stamping with inks a couple of times and nothing seemed to work so I put them away and almost gave them away!  I am now glad I didn't and kind of like how these turned out.  The key this time around was to use VersaMark and then heat emboss with Ranger super fine detail embossing powder.

I think the stamps can work for thank you cards or even Valentines


I am not sure whether you can see the detail from these photos but if your screen is big enough you just may see it!


Thanks for looking!

Hugz,
Sheree

Monday, 19 March 2012

Slider Card

Good Morning Chicks!

The CAS challenge at the Outlawz is to design an interactive card.  It took a while to think this up but.. I did it!

The slider card is put together like a present.  The flowers are made from punches and the flourish is done with a Tim Holtz die and thin cardboard which was painted with acrylic paint and then loaded with glitter.
The designer paper is called Manhatten and I picked that up from a discount bin for 25 cents a long time ago.  Ribbons are from WalMart and...
There you have it!!

Thanks for looking and I hope you all have a wonderful work week!

Hugs,
Sheree

Challenges:

Wednesday, 14 March 2012

Challenge Cards!

Good Afternoon Chicks!

This is a quick post.  We had a terrible wind storm with winds between 130 and 140 km/hr winds which blew everything apart up here.  Our power went out at home on Monday at 7:30 a.m. and have since found out that it could be off until Thursday 11 p.m. or later.  My teeth are starting to chatter!  It snowed twice today along with hail at one point.  You can see your breath inside the house!
We have power right now at the shop so am quickly posting two cards.  The lighting is horrible here so my card photos aren't that great.  They needed to be quickly posted because I'm going through Blogger withdrawl!!
Card Number 1 is for the Outlawz Sunday CAS challenge with a floral theme.

Here's a closer view of the embossing.  Too bad you can't buy that embossing powder anymore!!

Here's card number 2.  I originally made it for the sketch challenge at the Outlawz last Wednesday.  Due to power outages from our storm I couldn't get it posted so will add it to the bunch and find another challenge to enter it in to!


I don't have a recipe to type out right now because... we've been without power for three days now.  Once I can find things again, I will add the recipe to this post!

Hope everyone is well and happily stamping!

Hugs,
Sheree

Sunday, 4 March 2012

Stampscapes - Moonlight Tutorial

Good Morning Chicks!

I'm going to walk you through my moonlight scene for the March challenge over at Craft A Scene  I hope you'll be able to follow what I've done in the photos because the lighting isn't the best at home.


Step 1  -  Build the scene

I started by using the Country Stream stamp with Archival Black ink and Hero Arts clear embossing powder.  I find that Hero Arts is nice and fine so works well on detailed images.

Using tacky paper that I bought on a roll from Crafty Capers in Nanaimo I punched out a small 1" circle and stuck it down for the moon.  You will notice that I only did that on one card.

Let the image cool after embossing and then tap in some Lemonade with a ColorBox stylus or sponge tool of your choice.  I have also found that embossing the stamped images can create a kind of frosty effect which you will see in some of final photos.
 

Step 2 - Second Layer of Colour

Sometimes the moon will look white and sometimes it will have a yellow tone.  On this scene it will be yellow.  Due to dye inks fading out I used cantalope on the outer edges to intensify the colour.  I know.. you're thinking that I've got a loose brick upstairs and it's waaay too bright!  Dye inks fade over night so don't worry about it being darker.


Step 3 - Third Layer of Colour

Now we'll add the lightest blue called Aqua around the areas in yellow.  Why?  Well, when I look at the sky, the yellow fades to blue/black.  We'll be colouring over most of it anyway.  I like to add it now because there's no turning back once the darker shades are blended in.


Step 4 - Fourth Layer of Colour

Now doesn't this look horrendous???!!  After I added Stonewashed to the scene I realized that it's time to change now or forever hold my peace!  Never worry that you've ruined it!  Most can be saved by either leaving it in bright sunlight to fade the colour or, add something darker to cover it up!  One nice thing is that we will be going darker and darker so it will be hidden anyway.


Step 5 - Fifth Layer of Colour

This is actually a step for two colours!!  I just noticed that I didn't take a photo prior to adding Pitch Black!!
  
Before adding the black, use Adirondack Stream with the stylus and tap it from the outer edges in.  Don't worry about it looking so dark because it will lighten up beautifully!

Now you can start adding the black!  Oooops!

Are you still with me on this long process??  Now the fun begins!  This time I'm adding Pitch Black which is going to tone down the brights and make it more rich looking...to me anyways!  Tap it on from the outside in.  Be patient and things will come together!


Here is a closer view.  Still kind of looks like @%*# but you never judge a painting before it's done.

Step 6 - Add tree limbs to disguise any boo boo's or as a fill in

When you're finished the colouring, peel the tape off of the moon.  It will look stark white and unrealistic so... grab Lemonade (from the first photo) and tap a bit in around all of the edges.  Next, tap in some Cantaloupe on the left half.  This will give it more dimension!

Next I stamped the oak limb stamp and embossed with clear embossing powder.  I will emboss the stamped images at times to give it a bit more dimension and texture.  You can kind of see that in these photos for once!


Step 7 - Add Highlights

I added highlights with my white paint pen.  Love that thing!  Take care not to overdo it.  Then again, as the dye inks fade a bit, the white highlights blend in a lot more.


And now, here are the scenes mounted.  They look fabulous IRL.  I used Bo Bunny paper which looks stunning and rich.  Prior to mounting I did a wee bit of distressing with Black Soot along the edges.  My camera was not kind once again....  The second photo is actually darker than it shows.


The recipe is....

Stamps:  

Stampscapes - Nature Sheet 1 - Country Stream
Stampscapes - 203G - Oak Branch
Stampin' Up! - Sentiment
Inks..
Adirondack - Lemonade, Aqua, Stonewashed, Stream, Pitch Black
Memento - Cantaloupe
Archival Black
Distress Black Soot
Clear Embossing Powder
Hero Arts White Embossing Powder (Sentiment)
White paint pen
Paper:  BoBunny, Recollections, Staples White

 There you have it!  Have fun creating your own moonlight scene!

Hugs,
Sheree

Challenge Entries For...

Birthday Sundaes - Must have birthday sentiment


Wednesday, 29 February 2012

Color Challenge - The Outlawz

Good Morning Chicks!

The colour challenge this week at The Outlawz is Black, White and the third colour is your choice.  Here's the inspiration photo!


After a long while scratching my head I came up with the following design.  My mojo wasn't letting my put patterned papers together or allowing me to pick an image to colour so.... this is what I ended up with!

I started with black cardstock for the base and then white for the top.  Using the arrows on the cutting blade I cut a rectangle that was 1/2 inch all the way around.  The middle piece was made a touch smaller by cutting off 1/4 inch from two sides.  When you stick everything together it looks like a frame of sorts. 

Here's the photo of my card!  It almost has a tailored look to it.  Not too girly and not too manly.


The recipe is....

Stamp - Stampin' Up!
Paper:  Recollections, Staples 110lb white
Pop Dots
Inkessentials/Ranger Liquid Enamel

Quick and easy!!

Thanks for looking and have a wonderful day!!

Hugs,
Sheree

Sunday, 26 February 2012

Guest Designer At Quirky Crafts Challenge!


Good Day Chicks!

Last week I won a challenge at Quirky Crafts Challenge and was so excited!   When I finally realized and responded I was asked to be a guest designer for their new challenge starting today!  How about that! 

The theme for this challenge is The First Signs of Spring!  The sponsor for this challenge is The Stamping Boutique  You MUST go over and check out all of the designs for digi and rubber images.  I'll definitely be going back there for more as she has the nicest digis of flowers in watering cans that I've seen yet.

The daffodil design I chose to use is here.  I originally wanted to colour the watering can and tulips digi but when I started to colour... my grey copic died on me!  I must head to the store for some must have shopping.  When I get the right colours I will  be doing a card using it.  Can hardly wait!

Another requirement for the DT was to make a First Signs of Spring card using the Double Z-Fold Card.  Another 'first' for me!  I think it turned out kind of kewl so will probably end up making another one!

When I did the daffodil I printed out one more so I could colour a few different parts and then cut them out and use them for a 3D effect on the flower and leaf.  I'm not sure if you can see it but there's a few drops of  Glossy Accents to imitate dew drops.  Lastly I used some yellow stickles to add a bit of glimmer.

The recipe is as follows:

Daffodil Digi:  The Stamping Boutique
Sentiment Stamp:  Studio G (Dollar bin at Michaels)
Butterfly:  Stampin' Up!
Paper:  Three Bugs In A Rug, Bazzil, Staples 110 lb. White
Copic Sketch Markers
Stickles
Ribbon:  WalMart
Punches and Sewing Machine
Pop Dots

There you have it!  I'm off to have another look at The Stamping Boutique Digis!

Hope you all have a wonderful work week!
Hugs,
Sheree

Challenges:

Kenny K's Krafty Girlz - Spring Zing - Springy as possible - 03032012
One Stitch At A Time - Use a Digi - Spring/Easter - 03032012
Pan Pastel UK Challenge Blog - Use A Ribbon - 03032012
Stamp A Lot Challenge - In The Garden  - 02292012


Wednesday, 14 September 2011

Fall Is On It's Way!

Morning Everyone!
Another idea popped into my head last night so quickly put this together and I like how it turned out!
First I stamped  the leaves with VersaMark and embossed with Crafty Capers Copper Tinsel.  Veins were coloured lightly with Copics. 
Now I'm off to The Outlawz to enter my card in the Saturday challenge!
Hope you're having a wonderful day!
Hugs,
Sheree

Saturday, 2 July 2011

Get Well Cards Needed!!!

Update!  August 7, 2011

Hi Everyone!

Well... it seems that I've received every card except one and I know that one is definitely on it's way!

Thanks to Brenda, I have some cutouts done with the Tim Holtz/Sizzix Birdcage Die!  If you head on over to her blog, this die is being offered as her birthday candy this month!  Two of the birds are stuck together as you can use more than one paper at a time with this die!
Thanks soooo much Brenda.. For your card and the addition of candy!!


There is a wonderful, generous woman named Regina who resides in the United States and is a friend of Brenda, who generously offerered to add to the candy! 
When I received her e-mail in the beginning, Regina mentioned that she'd like to send along some flowers to be included in the candy that I was offering.  I arrived home from work a few days ago and there was a good sized box on the porch.  Here I was thinking that an envelope would arrive along with her card with a few flowers in it.  When I opened the box.... This is what I saw!!!


I am still in shock!! 
There are jars of gorgeous flowers, nexted containers of gorgeous flowers, a huge pile of loose flowers on top and then a pile of stamps!!!  Wow!!  I e-mailed Regina and asked how she would like the candy distributed and she answered back... whichever way I like... So, this is what I'm going to do!
I'll be adding stamps and flowers to the original three candy prizes.  Then I'll add a bunch more flowers to the Tim Holtz cutouts along with a prize of stamps and flowers!!  How does that sound?
The winners names will be put on this post tomorrow... Monday, August 14th.  I will also be sending an e-mail to everyone who sent the cards as there are some non-bloggers that participated.
Good Luck Everyone!  I'll be announcing names late Monday evening!

Hugs,
Sheree


I hope everyone is having a wonderful weekend!  Canada Day was on the 1st and Independence Day is on the 4th so both of us have long weekends.

Now... here's the reason I'm hoping Blogland can help me!

One of our customers at the shop is Ethyl Sanders.  She and her husband come over from Quadra Island to Campbell River for supplies and we work on their equipment. 
Approximately 1 year ago, if I remember right, Ethyl was in her kitchen cooking and tripped over one of their dogs.  Her head hit the woodstove and knocked her out so she didn't know one side of her face was being burned by the hot cast iron stove.  When she came to, she went to the mirror and was mortified to see that half of her face was severely burnt! 
Since the accident, Ethyl has endured four surgeries for grafting.  Skin was harvested from her head for one surgery, back for another, front for another, with these three surgeries each being rejected.   She is in the hospital right now going through hell with the fourth operation.
Being that she rejected the first three graftings for her lips, jaw, cheek and ear, the specialist in Vancouver decided to try another approach.  For the past few months Ethyl has had a balloon inserted into her neck to stretch the skin slowly.  Everything was looking fantastic and she once again went to Vancouver for facial reconstruction.  This fourth operation took place on June 24th.  The operation was a success until... somehow she came into contact with a virus floating around in the hospital and her new face became infected!  Since Saturday, June 25th, Ethyl has had to endure the surgeon pulling the skin away and scraping all the affected tissue three times, without any freezing.  I found this out when her husband came in on Friday the 1st of July.  His eyes were teared up as he explained everything to me.  He was heading home to find out the news of whether that day's operation was a success or not.  She had talked to him on the phone Thursday night and said that if they were going to do it again without putting her out she was going to get up and leave.
That is the horrible part of Ethyl's ordeal.  I met Ethyl when she came in one day and had a gorgeous silk scarf around her neck and tied in a bow.  It was obvious what the scarf was concealing.  Now, keep in mind that Ethyl must be in her mid to late 70's because they are great-grandparents!  I have never seen anyone look so regal and taking everything in stride!!  With her hair done and makeup on, donned in a suit and scarf she was absolutely gorgeous!  She is funny as heck and her eyes dance when she talks!  We talked for quite a while that day and she promised she would come show me the results after what was supposed to be the last operation.
Her husband and I spoke for quite a while on Friday.  It turns out that Ethyl is loved by everyone she touches!  Ethyls is not only gorgeous on the outside... but twice as gorgeous on the inside!
I am in possession of Ethyl's address on the island as I wanted to make a card to send over because I think of her so often!  While making the card tonight I thought... wouldn't it be wonderful if I could have cards sent from all over to let her know she is being thought of!  Which brings me to.....
If you would like to send a card you can e-mail me at sheree29 at telus dot net.  I will give you the address of our shop as I'm always there it seems!  All cards will be forwarded on to their Quadra Island address.  Everyone who sends a card will be entered to win some goodies!  I'm not able to give out huge candy right now but was thinking about some Stampscape stamps so you can try making scenes of your own.  What do you think? 
Because of our postal strike/lockout, Victoria at Crafty Capers in Nanaimo, won't have Stampscape stamps in for a few weeks.  I'll stamp the ones I'll put in a bundle so you can see what the candy will be once it comes in!

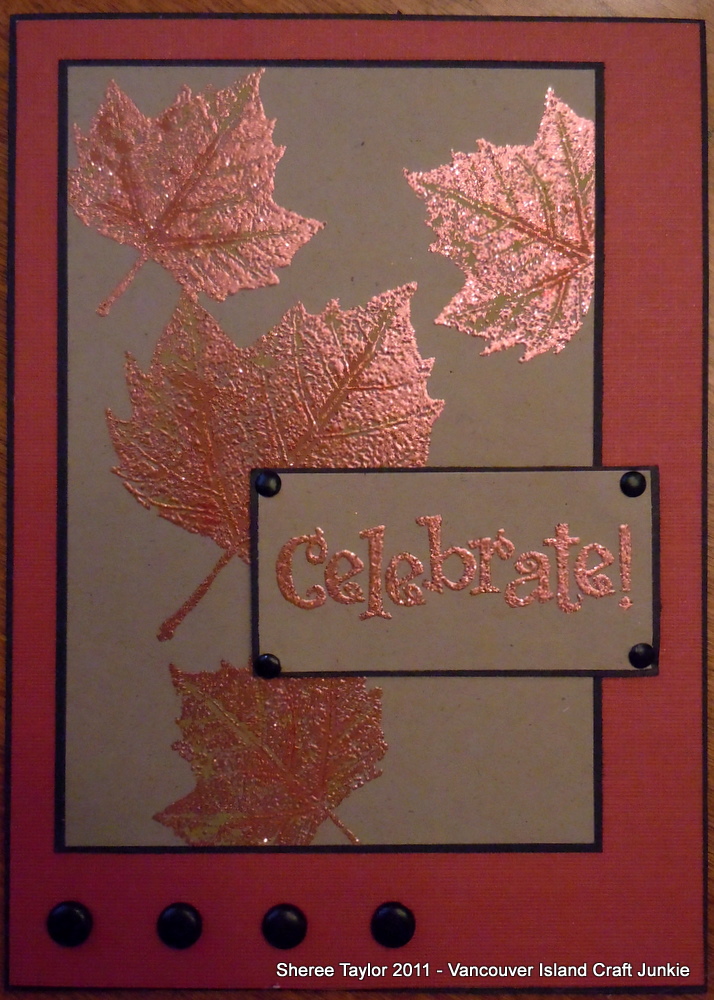
Here's my card for Ethyl!

Stamps used:
Stampendous - Agapanthus Cluster
Stampin' Up! - Greeting
Papers - Vellum, K & Company, Stampin' Up!
Ink - Brilliance White, Distress - Old Paper
Ranger Alcohol Inks used on vellum
Embossing powder - Burgandy and White opaque
Flowers - Home made using Nancy's tutorial here (Nancy's are waaay better!)
Diamond Stickles
Corner rounder punch
Pop dots!

Thanks for looking and I'm hoping everyone has a safe but wonderful long weekend!

Update!!
I will be adding a photo of the candy I am putting together for the draw from names of card submitters Monday morning.  It has been hard choosing which Stampscape stamps to put together so... I have decided that I will put together TWO batches of candy!  If I win the lottery this coming week I will send a full set of Stampscapes to all that send Ethyl a card!
Update: July 10, 2011
Those e-mailing me, or messaging me by Wednesday, July 13th will be eligible for the prizes!  Sorry but, I have to do a cut-off date lol!  All cards sent will be taken over to Ethyl on Quadra Island once they are received. 
I tried to get an update by phone on Saturday but there was no answer.  I'm hoping that everything is going fine at the hospital in Vancouver (city of the 2010 Olympics).  As I find out information I will post it on the blog!  Thank you for all of the responses!!  I'm so excited to gather them all together and present them to Ethyl!

Here is the candy to be won... so far!!  There will be two winners drawn.....make that three!!

Oooops... Having a little glitch!  I will post the pics tomorrow morning on my work computer.  Blogger can act up at times for some reason no matter which browser you use....Dont forget to check back!

For the first prize the winner will receive:

             Stampscapes Nature Sheet #6

The second prize winner will receive:

Stampscapes Nature Sheet #8
              
There is a possibility that I'll be adding to these prizes.  I'll have to see what Victoria has in stock at Crafty Capers in Nanaimo!

The third prize winner will receive:
Third prize is a set of two stamps... two of my favourites... Lakeside cove and Pines and Rocks.  Just these two stamps create beautiful scenes for those hard to do 'Guy Cards'!!

Nancy is adding some cash  to the loot so will pick out something for prize number 4!  Thank you to my wonderful friend Nancy!

Gina is sending along some flowers to add to the loot as well!    Thank you sooo much Gina!!

Good Luck Everyone!  I haven't had many replies sooo.. your chances are pretty darned good of winning!

Here are links to cards being sent!

Sherri  -  This card is gorgeous and a lot of love and talent has gone into it!  Check out her other work as well!  Thanks so much Sherri!

Shaz - You've never seen calligraphy like this before!  It's incorporated into her stunning cards.  This link shows the lily card she is sending.  Thanks Shaz!!

Nancy - You should see the card Nancy has made!  The colours are so pretty and I love the layout, the beautiful sentiment and all of the embellishments!  Nancy has beautiful cards for you to check out!

Angela - I've gotten to know Angela through The Outlawz!  She is on the design team there but also has a fabulous blog to check out as well!  I just LOVE the butterfly on her card for Ethyl!

Brenda - Brenda has created a beautiful card for Ethyl!  I really love how she used the Tim Holtz die for the birdcage and bird!  I've followed Brenda for quite a while now and her designs never cease to amaze me!

Thursday, 19 May 2011

Stampscapes - Father's Day

I'm Back!!!!

Sorry about the delay in posting but, we finally have had a couple of days of sunshine!  I watched the blue sky all day at the shop and for once it hasn't rained from 3 p.m. on so I was able to get a bit of yard work done!  Now I'm getting yard work done and haven't had much time to hibernate in my favourite room!

This is a quickie card I threw together just to see how it would turn out.  I've had this paper on the brain for a while and did a small Stampscape just to see how it looked.  I found a small roll of twine in my stash and took a cue from Karen at Feline Creative.  (I'd love to create like her when I grow up!!) 

Stamps:       Country Stream Small - Stampscapes; Sentiment - Stampin' Up!
Paper:          s.e.i.  Moonrise (moss) from Crafty Capers; Kraft and Black from
                   Recollections
Twine:         Can't remember (I'm actually too tired and lazy to run upstairs and look!)
Inks:            Adirondack Dye Ink pads:  Lemonade, Aqua, Pool, Meadow, Mocha
                   Distress Ink pads:  Frayed Burlap
Diamond Stickles. Pop dots

Anyway... just thought I'd post this to see what happens.  Thanks for looking!!

Hugs!

Sheree

Sunday, 8 May 2011

Flourishes Birthday

Happy Mother's Day to all my new friends!!
I worked on this card earlier this past week but was changing this and that all the time until it was finished two evenings later.  The shop was so busy this week that I didn't have time to post a thing!  I was up early this morning with my pups so headed down to the old computer to upload and post while the rest of the world lay sleeping.
I've loved this stamp for a long time now and finally sat down with my Copics to colour it in and bring it to life.
Stamps:             Flourishes; Just Rite (Greeting)
Papers:              K&Company; Stampin' Up!; Recollections
Inks:                  Stampin' Up!; Distess Old Paper
Doily:                Wilton from the Michael's baking aisle
Ribbon:             Satin Pink - WalMart; Seam binding from FabricLand
Flower:              I made after following Nancy's tutorial
Stamens:           Michael's - Wedding aisle
Pin:                   Lindy sent to me!  Here is her tutorial!
Highlights:         Jelly Roll Star pen in gold
Pop Dots
Thanks for looking!  Hope you all have a wonderful day!


Monday, 25 April 2011

Post Wedding Thank You


Happy Monday Everyone!
The wedding is overwith and went well for the most part.  I made this card for the caterers as they did an outstanding job with the reception!  I gained 20 pounds from eating vast quantities of the most tender, delicious roast beef I've ever had in half a century, or more.

The stamps used were:
Main image and greeting:     Upsy Daisy - Stampin' Up!
Butterfly:                             On Gossamer Wings - Stampin' Up!
Greeting inside:                   In My Thoughts - Stampin' Up!

Paper:                                 Staples mottled tan, Michaels black
Ribbon:                              WalMart sheer black
Jelly Roll Platinum Star:       On butterfly wings
Scoring:                              Martha's scor board (love that thing!)
Pop Dots:                           1/16th inch thick
Ink:                                     Versamark black

This was a quickly thrown together card but think it turned out alright.  I finally used a couple of stamps I've had for quite a while now.  Will have to bring them out more often! 

The butterfly is stamped twice and popped up.  It needed 'something' and that's all I could think of!

Have a wonderful week my friends. 

Tuesday, 19 April 2011

Optical Illusion Sympathy Card

First off... Hi Everyone!
I found out yesterday that our neighbour's dog passed away at 7 years due to liver failure.  She was a gorgeous, intelligent, mild mannered shepherd/lab cross and we will miss her dearly... along with our other neighbours with whom she'd go visit when she was bored.
I wanted to stick a little card in their post box because I knew their three young boys were heartbroken.
Now... before I see question marks show up on your foreheads I'd like to say that this card has squared corners and the sides are actually straight!  Being the wonderful photographer that can screw up a photo on 'auto-pilot,' it looks like it ate too many brownies!  Truth is... I ate too many brownies!


The main cardstock is from a batch I bought at Staples when the dinosaurs roamed the earth and it is a mottled tan.  Others are unknown except for the patterned which is sei Moonrise Moss.... From Crafty Capers - Nanaimo.  The ribbon is from Staples and the brown pearls from Dollarama.
The stamps on the main image are from Stampin' Up! along with the sentiment.  Inside the card I used Impression Obsession stamps.  Inks used were True Thyme and Old Olive from Stampin' Up! and Sage from.... an inkspot!  lol 
Now.. I'm sure it's the corners that make my card look fat!!  Good old Martha punches helped me achieve that effect.
There you have it!  Wish I could show you that it does really look anerexic (sp?)
Have a great evening and I'll be popping around to comment after I watch Glee!
Hugs,
Sheree

p.s.  I am still roaring about your comment on the Stampscapes post from earlier today Jacki!!!  I may try a hedge next time!!  I am a firm believer in 'Living On The Edge'!

Wednesday, 13 April 2011

Zesty Thanks!

Good Morning Everyone!

Just another quickie post today.  I needed a thank you card to send to one of our customers because I've made some Mason Bee houses and he's supplying me with the bees!  Can hardly wait to see how many apples we'll get this year!

The papers I used are unknown except for the one behind the 'Thanks' which I did with alcohol inks.  The solid orange/yellow is from an old stash of Stampin' Up! I have.  The bow was done on the 'Bow Easy'.  The stamps are from Stampendous and it's the first time using them... Wish I had brought them out sooner!  Copics were used to colour the letters.
I just love the cards at Feline Creative so tried a layout of my own.  Karen creates the most beautiful cards so I layered my papers and stitched the edges similar. 
Everything went together well and looked great.  I should have stopped there!  While watching a show I wondered how the letters would look with more stickles but in Orange Peel.  The orange shows up a little too much for my liking but... it was too late to turn back.  They say you learn something new every day and.. I have once again!
Thanks for looking and hope you have a wonderful Wednesday!

Wednesday, 16 March 2011

Just For Fun!

Hi Everyone!

Just a quick post of what I worked on tonight. I'll write more details tomorrow night after I get back to town. It's late and I'll be getting up at 4 a.m. to go work down island tomorrow.
This card will be entered at Heart Song Inspiration blog and I'll check around for others tomorrow.
Have a great evening... what's left of it!!
Talk to you all tomorrow...

I am back!!
On Wednesday I was asked to enter a challenge at Heart Song Inspirations so after I finished dinner I went to work trying to think up something that would work with the sketch there... this is what I came up with.  I am the first one to admit that I am much better at Stampscape scenes but I will give anything a whirl!  Thanks to all the Heart Song girls for leaving such wonderful comments on this post while I was at work!  You all boosted my spirits so high!!
The plaid paper is from G and the others are miscellaneous from my stash.  The stamp is from Stampin Up! and the bow made from Michaels ribbon and I used the Bow Easy which is one of my favourite tools.  Stickles were use to highlight the fairy and the flower.  My cutter must be wearing out because I had one heckuva time getting even cuts so.. used my Fiskers scissors to deckle te edges which hid all crooked cuts!!  WooHoo!  That was the first time I have touched those!!

Thanks for looking!!

Challenges I've Entered:
Heart Song Inspirations - Sketch
Simon Says Stamp Challenge - Anything Goes
Posted by Picasa

Mothers Day Card - 2

Good Morning Everyone!
I'm loving Tim Holtz' Perfect Pearls at the moment!  I started playing with the copper and bronze last night along with a fern frond stamp from Stampin' up!  I wish you could see how the Perfect Pearls glisten in the light!
First off I used my anti-static bag for embossing and it helped quite a bit with getting the pearls only where I wanted it.  Next, I put Perfect Medium on the stamp and stamped it randomly off the page.  You need to recoat the stamp with Perfect Medium every time you stamp.  This medium is clear but does have somewhat of a sheen to it so if you tilt it towards the light you'll see where you need to fill in.
Once the stamping is finished it's time to dust on the perfect pearls!  For the fronds I put copper towards the tip and bronze closer to the bottom.  If you were here to see the card for yourself you'd see that there is a subtle difference!  Next, take your larger fluffy brush and gently get rid of any excess powder.  Spritz your work lightly to set the pearls and that part is finished once it dries!
After that... it's up to you what type of dp's and embellishments you use.
The sentiment is from an old Stampin' Up! set and says...
"A mother is someone who can take the place of all others but whose place no one else can take."
Good luck and have fun playing with this fantastic medium!

Thanks for looking!

Saturday, 5 March 2011

Anniversary Card


Hi Everyone!

I was feeling creative last night and started playing with all of my 'stuff.' The Happy Anniversary stamp from Inkadinkado was purchased last month and then I really felt the need for the large Spellbinders so picked them up too! Seeing as the budget was now blown I wasn't able to pick up some awesome looking blue flowers so... I tried making my own as I had watched Tammy's tutorial last week! So... Hmm.. didn't have the right flower punch and ended up looking through my Cricut cartridges and found one sort of similar on the Accent Essentials cartridge (pg. 63). When I had them put together and curled they looked awesome! Thought I'd take it a bit further and used my Stampin' Up! watercolour crayons to deepen the colour of each petal towards the center. Once they were put together I added Diamond Stickles to all petals on the outside edges. The picture makes them look like cr#* and honestly... they really do look better here in front of me!
I embossed the stamped image with Stampendous Blue Tinsel on top of Stonewashed Blue ink. Tried using clear Versamark but the blue embossing was too transparant. The second layer was put through the CB with the paisley folder. The ribbon was done on the 'Bow Easy' with thin cream and a dark blue that I've had around since dinosaurs roamed the earth. The heart stick pin was purchased the other day. What a score! There were loads of them in cream and also red for $4.00 at The River Scrapbook Room in Campbell River! I picked up the webbed ribbon? at the same shop. The cream was just toooooo creamy so picked up Distress Aged Paper today (now I've REALLY blown the budget!) as they were out of Antique Linen. That seemed to do the trick and made the embossing stand out a lot better. Added pop dots here and there for dimension and there you have it!... My 'Out of my comfort zone' card! Using 3-D flowers and extra ribbon along with pins is foreign to me so even though it's not a perfect card... I'm on my way to getting there!
Thanks for looking and hope you all have a wonderful weekend!
Posted by Picasa

Tuesday, 8 February 2011

Thank You


Good Morning!
Well... I finally felt well enough to sit in the craft room and play!  I pulled out these papers from Stampin' Up! that I've been hoarding for quite a while and finally decided to use them up.
The main colours are baja breeze, kiwi and next to navy.  Nothing stood out on the card so I used my large scallop circle punch and made the corners.  The layered circle is popped up.  The greeting and flowers are from Stampin' Up! Spring Solitude and were embossed in silver.
Not my best work and it looks much better than what the camera portrays.  I'll blame the camera again!
Thanks for looking!